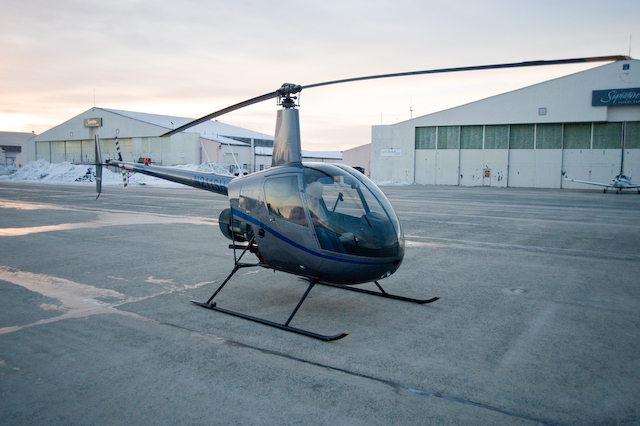
Start on the right side of the helicopter. On an R22 with an auxiliary fuel tank, you'll see two doors. Open both of them:
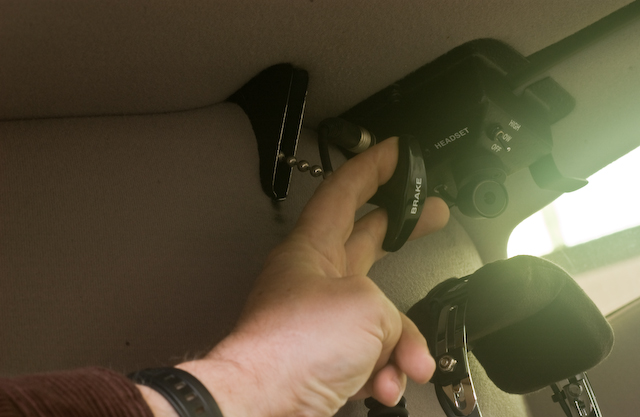
At the bottom, you'll see a small panel of push buttons:
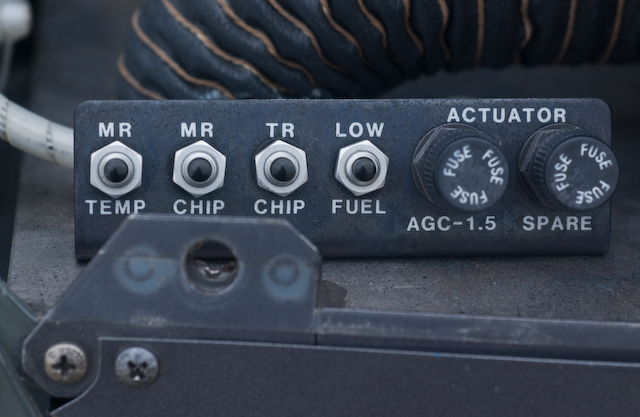
Push each one of these in turn. The corresponding light in the cockpit will light up. This lets you check that the lightbulb and wiring harness work. It does not check that the actual sensor works. In the case of the low fuel light, on newer helicopters you have to push and hold the button for a couple seconds before the light comes on. Pilots often give up on the light too soon and release the button just before the light would have come on.
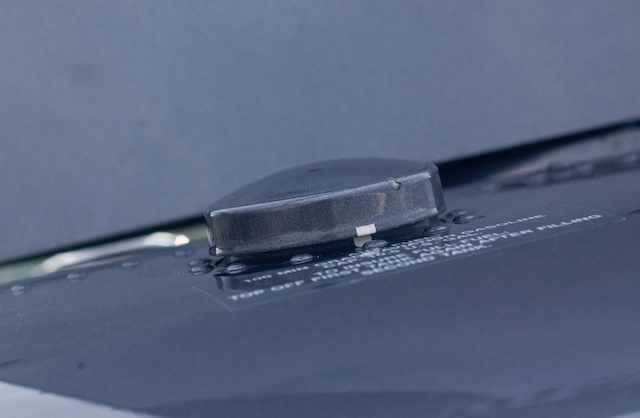
The fuel cap has a line painted on it, as does the fuselage: Make sure that the two paint strips are lined up - this tells you that the cap is on tight. Some older R22s had a chain to connect the gas cap to the fuselage, so that the cap would not get loose. The problem with those is that if you forget to put the gas cap back on, it bangs around and dents the outside of the fuel tank terribly. It's better to just lose the cap so the chain has been gone for some time now.
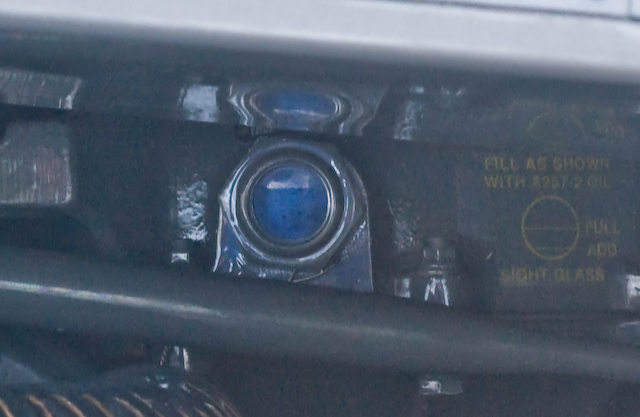
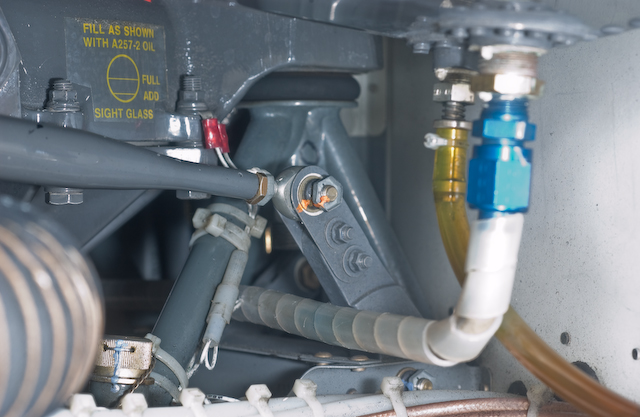
The sight glass lets you verify the amount of oil in the transmission. If you look to the right edge of the picture, there is a yellow decal which shows you what the level should look like. Unlike an automobile engine, the transmission oil does not get used up, so if the level is going down over time there is probably a leak. That would not be typical: usually there is no leak and you never have to add oil. If you have to add oil on a regular basis, you need to have your mechanic look into what is going on.
Another thing to check is the color of the oil. As you can see in the picture, the oil is blue. If the oil appears to be a muddy brown, that generally means that water is getting into the oil. The typical way that this occurs is through the hollow rotor mast, either because he aircraft is being left out in moist conditions, or someone is spraying water into the rotor head during washing of the helicopter. It's not great, and you might want to flush the oil at some point, but I have seen plenty of R22s with muddy brown transmission oil.
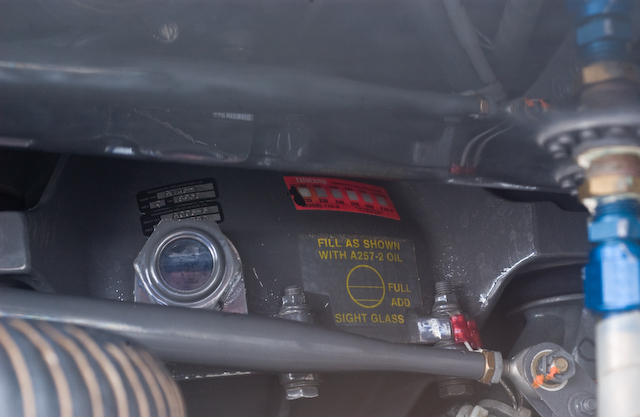
In the above picture, above the yellow decal you can see an orange strip of paper on the transmission. This is a Teletemp. The purpose of the teletemp is to record the highest temperature the part has reached. Different teletemp strips are rated for different temperature, so you can't mix and match them. When the helicopter component reaches a particular temperature, all the teletemp boxes below that temperature will turn black and stay that way permanently. In the photograph above, you can see that none of the boxes have turned black yet. A mechanic has put a black pen mark to the left of all the boxes to indicate that when he inspected the component none of the boxes had turned black. If a mechanic or a pilot sees more boxes turn black, it is an indication that the part is running hotter than in the past. A new mark would be made to record this new temperature, and the person needs to ask themselves whether this is explainable. If the helicopter was working on a hot summer day, or was using a lot of power, this might explain the transmission running hotter, and thus might not need any more attention. On the other hand, if there were no conditions that would explain the increased temperature, it might make sense for a mechanic to look into the situation.
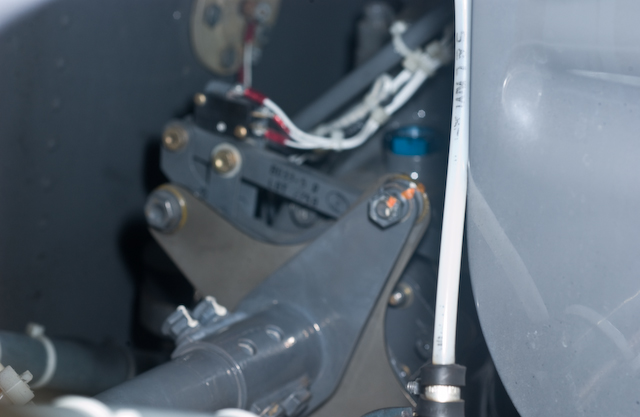
The name "clutch" is confusing to many people flying the Robinson helicopters, because there are two clutches that we commonly talk about, although they perform different jobs. The clutch that we engage during startup is a system which jacks up the upper pulley until the belts have sufficient tension to turn the rotor system. The other clutch that we talk about is the "sprag clutch" which is built into the hub of the upper pulley. On some other helicopters, this is called the freewheeling unit, which I think is a better name as it describes what it does.
The purpose of the sprag clutch is to let the rotor continue to turn if the engine should fail. In the Robinson, it is built into the hub of the upper pulley, and is filled with oil. If you look at the hub and see an oily liquid on the face of the pulley, chances are the seal is broken. You would want a mechanic to check it out before you fly it.
At the top of the cowling area you will see the static source. This measures the static pressure inside the helicopter fuselage. The static system is connected to the Altimeter, VSI, and Airspeed indicator. You want to check that nothing is blocking the tube - insects would be a big concern, but I suppose other things could get lodged inside the tube. Anything that prevents the free flow of air in the tube would cause the flight instruments to read iincorrectly.
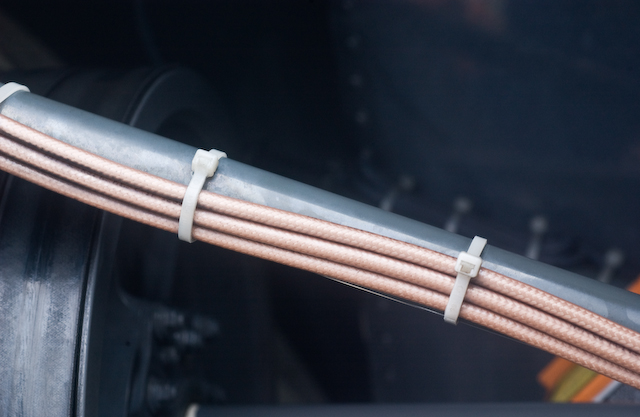
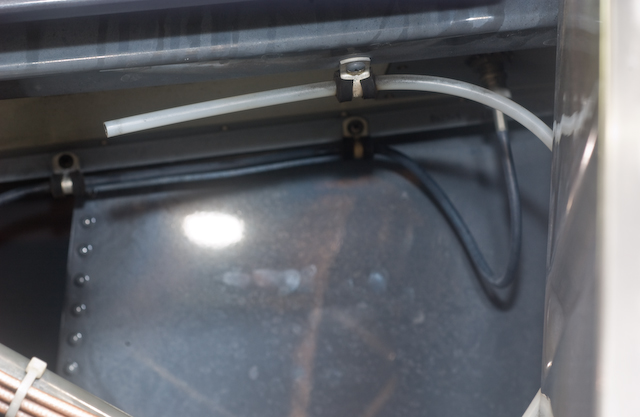
You will find a great many tie wraps throughout the helicopter. Their job is to make sure things are not flopping around where they can interfere with rotating components. Check that they all appear intact, and if you find one that has been removed by a mechanic you may want to check whether he meant to replace it and simply forgot. I suppose they could get brittle and break on their own, but I've never seen that happen, so it's not very likely.
In this photo you can see the tail rotor control push/pull tube connected to a pivot by a spherical bearing with a torque striped pal nut. Make sure the pal nuts are in place and tight.
Make sure both doors are closed and latched - check that the three latches are fully clockwise - they should be horizontal.