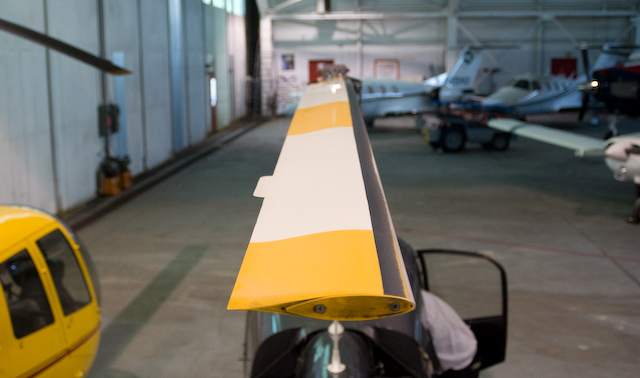
Examine the blades for signs of hangar rash, in flight collisions with objects, or delamination. Dents or bulges should be verified with a mechanic.
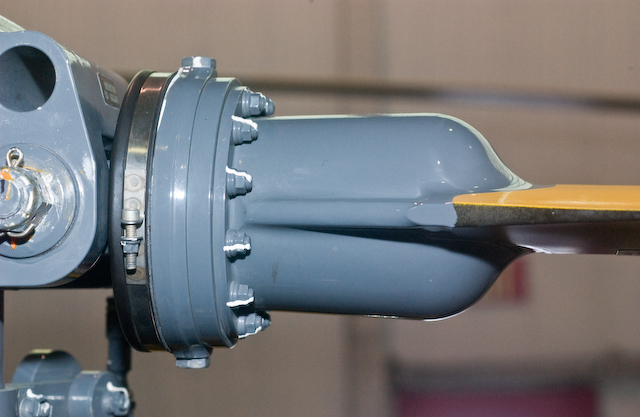
Inside of the root of the blade (the blade grip) is a bearing pack which allows the blade to feather. There is a red lubricating fluid inside. You can see on top of the grip there is a bolt which can be removed to add fluid, and a bolt on the bottom which can be used to drain the fluid. On the left end, the black rubber boot is what keeps the fluid in the grip. The hose clamp is what keeps the boot on the blade.
On preflight, I run my hand along the bottom of the rubber boot to check for leaking fluid. I also check the top of the mast fairing, because when the blades are parked aligned front/rear, a leaking blade grip will leak right onto the fairing.
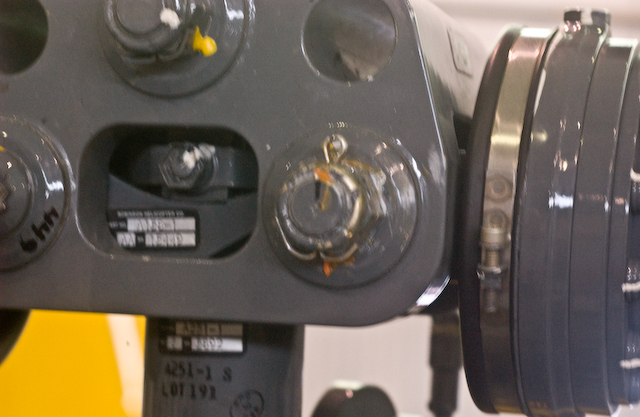
For each of the 3 main bolts, check that the cotter pin is present, the washer is not cracked, and the torque paint is intact.
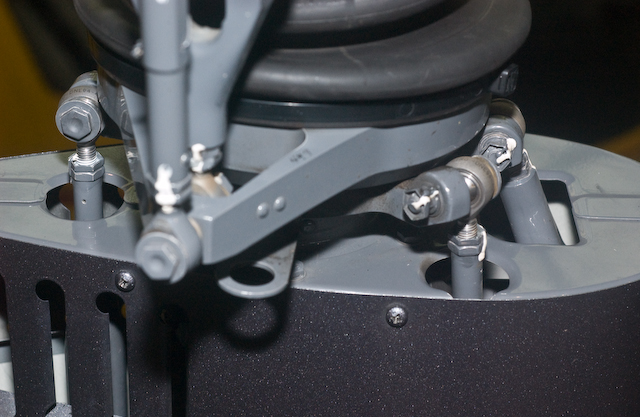
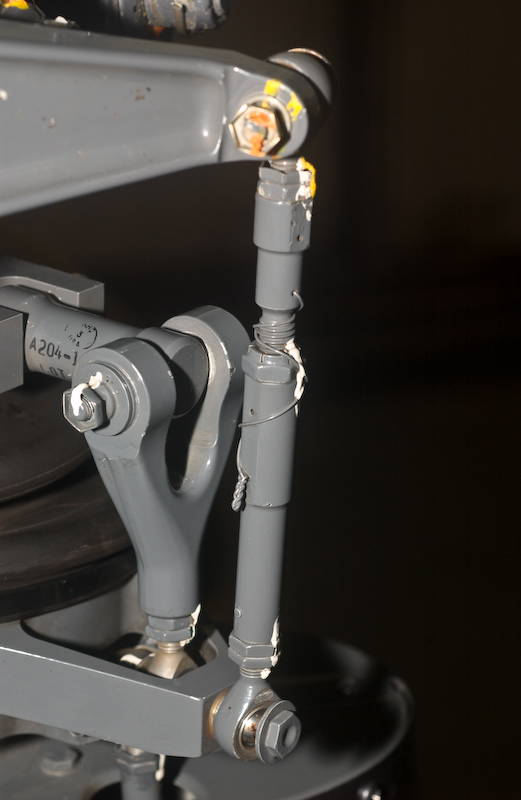
Give each of the rod ends a turn to make sure that they seem to be able to move, but are not loose. There are three rod ends. There is an extra rod at the front which does not move. If the front of the ship was 12 o'clock, the non-moving rod is at 12, there are rod ends at 11 and 1 o'clock, and another at 6 o'clock.

The pal nut (or jam nut) pictured here is present to stop the nut from trying to back off. Check that it is present, and that the torque paint is present. There is one jam nut at the top of the pitch link, and one at the bottom.
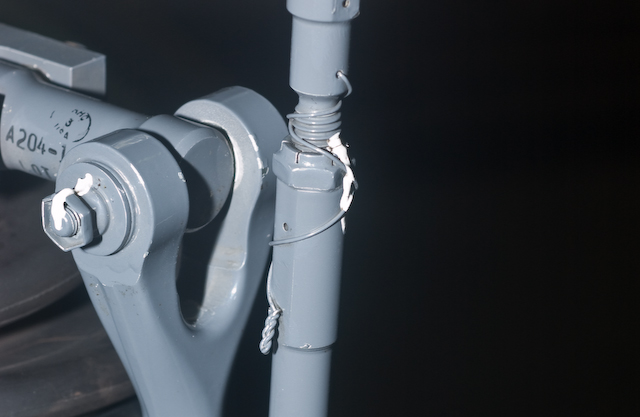
In the middle of the pitch link the barrel can be adjusted to make the pitch link a different length. This is how the rotor RPM is rigged. The safety wire is there to make sure it isn't changing length while you are flying!
In the picture below you can see two of the fasteners you should be checking - one is at the top of the swashplate dust cover, and the other one is at the bottom. I count the two hose clamps on the pitch change boots as fasteners, so that makes 4 in all on the rotor head.
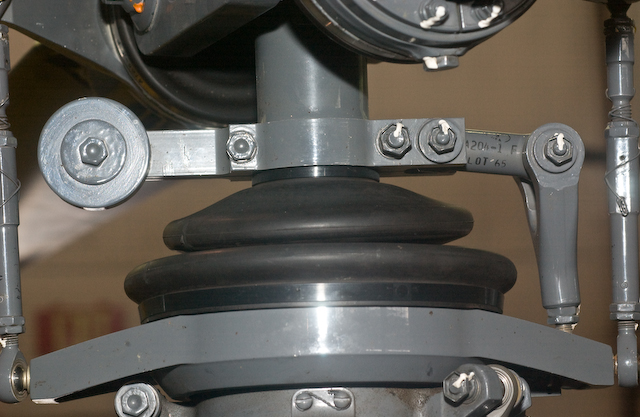
The scissors turns the rotating part of the swashplate. Grab the hinged part on the right and give it a wiggle. There will be a small amount of play in the plane of rotation, but there should be none in the up/down and in/out directions.
Another view of the scissors, including a detail of how it attaches to the rotating part of the swashplate.